Leave Your Message

How to Install a U Hook Wiper Blade?

A U Hook Wiper Blade can look simple to install, yet one small mistake can leave the blade loose or poorly aligned. The hook should pass fully through the blade’s adapter and lock with a clear, secure fit. Before starting, check that the replacement matches your vehicle and the old blade’s connector. A close match matters.

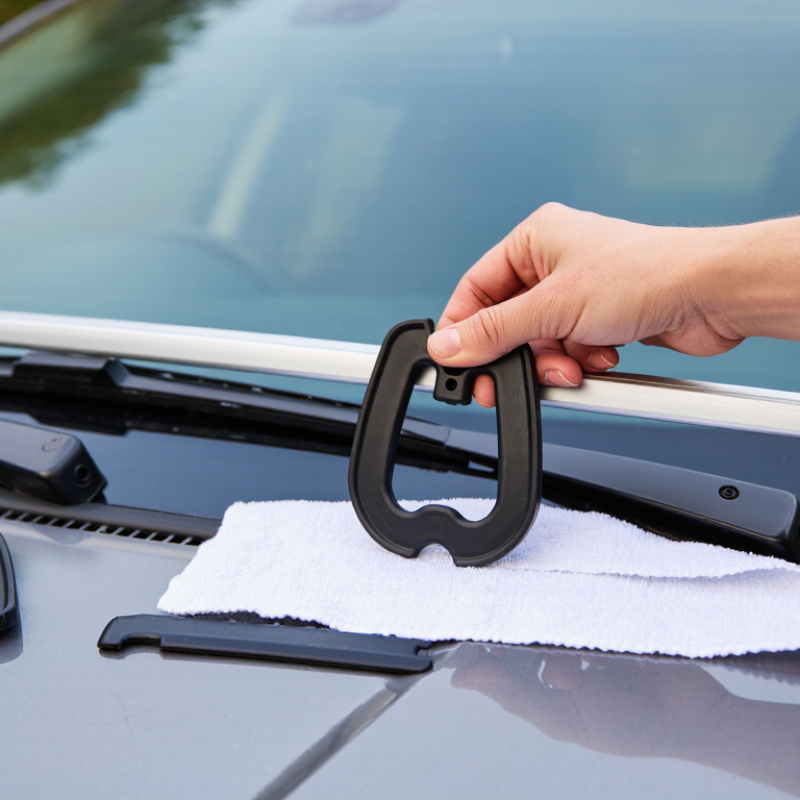
This guide explains how to remove the old blade, position the new adapter, and confirm the connection without forcing the arm. You will also learn what to check if the blade feels stiff, sits at an angle, or fails to click into place. Keep the wiper arm supported while the blade is off; its exposed metal tip can strike the windshield if released. A towel over the glass adds a simple layer of protection.

Good installation depends on careful checking, not guesswork. Gently tug the fitted blade, lower the arm slowly, then test the wipers with washer fluid. Watch for skipped areas, unusual noise, or movement at the connector. Small details count. No article or source was supplied with a verifiable industry expert’s name and quotation, so attributing a quote here would risk inventing authority. That gap deserves attention; an expert quote should be added only after its source is confirmed.
How to Install a U Hook Wiper Blade?

Prepare the Vehicle and Select the Correct U-Hook Wiper Blade

Before fitting a U-hook wiper blade, park on level ground, switch off the ignition, and keep the keys away from the controls. Raise the wiper arm gently. Its spring can snap it against the windshield and chip the glass. Place a folded towel beneath the arm as a simple safeguard. Check the existing blade and arm for dirt, rust, or damage. A clean, stable work area makes small clips easier to inspect. Do not rush this part.

Choose a blade listed for your vehicle’s exact year, make, and model. Check the driver-side and passenger-side lengths separately; they may differ. The replacement must include an adapter that fits a U-shaped hook, not just a similar-looking connector. Compare the new adapter with the old one, and confirm its locking tab can engage the hook securely. Your owner’s manual or a reputable vehicle fitment guide can verify the size and connection type. Measuring the old blade is useful, but it can be misleading if the wrong blade was installed before. A second check is worthwhile. If the hook is bent or the arm feels loose, pause and inspect it before attaching a new blade.

How to Install a U Hook Wiper Blade? - Prepare the Vehicle and Select the Correct U-Hook Wiper Blade

Stage What to Check How to Prepare or Select Useful Result
1. Park safely Vehicle position and ignition state Park on level ground, switch off the ignition, and set the parking brake. Follow the vehicle manual if it specifies a service position for the wipers. The wipers are stationary and the vehicle cannot roll unexpectedly.
2. Protect the windshield Exposed glass beneath the wiper arm Place a folded towel on the windshield under the arm. Lift the arm carefully and keep hold of it; a spring-loaded arm can snap back onto the glass. The glass is cushioned if the arm slips.
3. Confirm the connector Shape of the wiper-arm end Check that the arm has a curved U-shaped or J-shaped hook. Do not assume every curved arm uses the same hook dimensions or blade adapter. The replacement blade is designed for the actual arm connector.
4. Find the correct length Driver-side and passenger-side blade lengths Use the vehicle owner’s manual or a reliable vehicle-fitment reference. If measuring an old blade, measure the rubber blade from end to end and check each side separately. The selected lengths match the vehicle’s specified sizes; left and right blades may differ.
5. Verify hook fit Hook width, thickness, and adapter compatibility Compare the wiper-arm hook with the blade’s fitment information and included adapter. U-hook arms are available in different sizes, so confirm the exact fit rather than relying on appearance alone. The adapter can seat fully on the hook without forcing or excessive looseness.
6. Check blade condition and clearance Rubber edge, blade frame, and nearby trim Choose an undamaged blade of the specified length. Confirm that the blade will not extend beyond the windshield or interfere with the other wiper, windshield edge, or bodywork. The blade has a clear wiping path and does not collide with adjacent parts.
7. Get ready to install New blade packaging and installation instructions Check the package for the correct U-hook adapter and read its release and locking instructions before removing the old blade. The correct parts and installation steps are ready before the wiper arm is exposed.

Lift the Wiper Arm and Remove the Old Blade

How to Install a U Hook Wiper Blade?

Lift the Wiper Arm and Remove the Old Blade

Park the vehicle, switch off the wipers, and make sure the blades are not frozen to the glass. Lift one wiper arm carefully until it stays upright. Some arms spring back with surprising force, so keep a firm grip. A folded towel on the windshield offers a little protection if the arm slips. It is a small precaution, but an easy one to forget.

Find where the blade meets the curved U-shaped hook. Look for a locking tab or plastic cover, then release it as directed by the blade design. Slide the old blade toward the open end of the hook; gentle wiggling may help if it feels stuck. Do not twist the metal arm or force the connector. Take it slowly. Once the blade comes free, lower the arm onto the towel rather than letting it snap against the glass. Check the hook for dirt or damage before fitting a replacement. The release can be awkward from certain angles, and stopping to reposition your hand is better than pulling harder.

Align the New Blade with the U-Hook

Raise the wiper arm carefully and place a folded towel on the windshield beneath it. This protects the glass if the spring-loaded arm slips. Turn the new blade so its connector opening faces the U-shaped hook. Slide the hook through the adapter until it reaches the stop. Keep the blade centered; don’t twist the metal arm to make it fit.

Rotate the blade until it sits in line with the arm, then pull it gently to check that the latch has engaged. You should feel a firm hold, not a loose wobble. Lower the arm slowly. A poor connection can let the blade shift or detach during use. The Federal Highway Administration’s Road Weather Management program estimates that weather contributes to about 1.2 million U.S. crashes annually; that figure covers many conditions, not wiper failures specifically, but clear visibility matters in bad weather.

Tips: Check the adapter instructions, since hook sizes and locking tabs vary. If the blade won’t slide on smoothly, stop and inspect its orientation. I’ve found that rushing this step is easy; a second look before lowering the arm is worth it.

Slide and Lock the Blade onto the Wiper Arm

Raise the wiper arm carefully and protect the windshield with a folded towel. A bare arm can snap down and chip the glass. Check that the replacement blade fits the arm’s hook size and follow its adapter instructions. Small adapter differences matter.

With the blade pointing away from the arm, guide the U-shaped hook through the opening in the blade’s connector. Slide it along the channel, then rotate the blade until it sits in line with the arm. Pull gently until the latch clicks or the hook is visibly seated. Give it a light tug. It should stay attached, with no loose movement. I still check this twice; a click alone is not proof of a secure fit. If the connector will not slide freely, stop and recheck the orientation instead of forcing it.

The Federal Highway Administration reports that about 1.2 million police-reported crashes occur each year in weather-related conditions in the United States.

Clear, working wipers support visibility in rain, but correct installation matters too. Lower the arm gently, wet the windshield, and run the wipers briefly. Watch for chatter, uneven contact, or lifting at the blade’s tip. A dry-glass test can create noise and wear, so use water. If the blade shifts or streaks persist, reinstall it and inspect the rubber edge.

Lower the Arm and Test the New Blade

Once the U-hook blade is attached, keep one hand on the wiper arm and guide it toward the windshield. Do not let the metal arm drop freely; its spring tension can crack glass or damage the arm. Lower it slowly until the blade rests flat against the windshield. Check that the rubber edge sits evenly and the connector does not shift. A small gap or crooked angle may mean the hook has not locked fully.

Tips: Place a folded towel on the windshield while working nearby. Keep fingers clear of the joint, and avoid pulling on the rubber insert. It is easy to assume the blade is secure just because it clicked into place. Give the connector a gentle tug before lowering the arm.

Remove the towel, then test the new blade with windshield washer fluid. Use a brief setting and watch the full sweep from inside the vehicle. The blade should move smoothly without skipping, chattering, or striking the frame. Listen closely. If it makes noise or leaves narrow streaks, stop the wipers and inspect the fit and blade angle. A little fluid residue can cause temporary streaking, so wipe the glass and test once more. Do not run the blade over a dry, dusty windshield; that can obscure the result and wear the rubber sooner.

How to Install a U-Hook Wiper Blade: Lower the Arm and Test

These approximate times are per blade and vary by vehicle and blade design. After the blade clicks securely into place, lower the arm gently and test the wiper with washer fluid. Follow the vehicle manual and protect the windshield while the arm is raised.